Garliky Smashed Roasted Potatoes….

Garlicky smashed potatoes

image

I still have to meet one single person who does not like potatoes .. I love them and can eat them in any form . Be it grilled, baked, roasted , hash deep fried…. So when my dear blogger friend Sonal from simplyvegetarian777  suddenly asked for a potato recipe for a last minute collective ( she was very clear that she wanted Potatoes as the star & visible and not hidden in the recipe ) I realized that I did not have even a single one in my blog which showcased the humble potato ..
So here I am with my very first JUST POTATO RECIPE .

These garlicky smashed potatoes are perfect for those quick appetizers as well as elegant enough for those special occasions and get to gathers and surely a crowd pleaser and very quick and easy to make ..
I have kicked up a notch with some fresh garlic and red pepper flakes

Garlicky smashed potatoes

image

For these incredibly tender on the inside yet amazingly crisp on the outside potatoes I have used small red potatoes along with yellow baby potatoes… A table spoon of fresh crushed garlic and a tablespoon of fresh rosemary ( you can use any herb of your choice ..

Garlicky smashed potatoes
image
image

To prepare these potatoes you will be needing

300 grams baby potatoes ( I used red as well as Golden potatoes )
1/4 cup cooking oil ( I used Olive oil )
1 tbs freshly chopped Rosemary (you can use any herb of your choice)
1 tbs fresh chopped garlic ( optional )
1 tbs red pepper flakes or as per taste
Salt as per taste ..

Method ::
1. Generously cover potatoes with cold water in a 3-to 4-quart pot and add 1 tablespoon salt.
Boil until almost tender, 10 to 15 minutes. Drain potatoes.
OR
Microwave the potatoes on high for 4 minutes ( I used the microwave )

2. Place potatoes on a plate or baking sheet . Using a potato masher or fork, carefully smash the potatoes until flattened but still in one piece.
3. Heat oil in a 12-inch heavy skillet over medium-high heat.
4. Transfer potatoes with a spatula to the skillet.
6. Add salt , red pepper flakes , fresh garlic and rosemary .then lower heat to medium-low and cook, turning once, until golden brown.
5. It took me about about 20 minutes to do both the sides ..

ALTERNATIVELY
Preheat oven to 450 degrees F.
Lightly oil a baking sheet or coat with nonstick spray.
Place potatoes onto the prepared baking sheet and carefully smash the potatoes until flattened but still in one piece.
Top with oil, salt, red pepper flakes , garlic and thyme.
Place into preheated oven and bake for 18-20 minutes, or until golden brown and crisp.

Garlicky smashed potatoes

image

This one’s a sure crowd-pleaser, for the holidays and beyond And really I see no reason why you shouldn’t make this at the most earliest convenience…..

Make Ahead Tips
You can boil and flatten the potatoes the night before.

Store them in a container, lightly covered, in the fridge.

Next day bring the potatoes to room temperature and cook either in the pan or in the oven …

Garlicky smashed potatoes

image

Cooking is like love: It should be entered into with abandon or not at all.” — Harriet van Horne


Garlicky smashed potatoes

image

Tortilla Pinwheels …..

Mexican Tortilla Pinwheels..

image

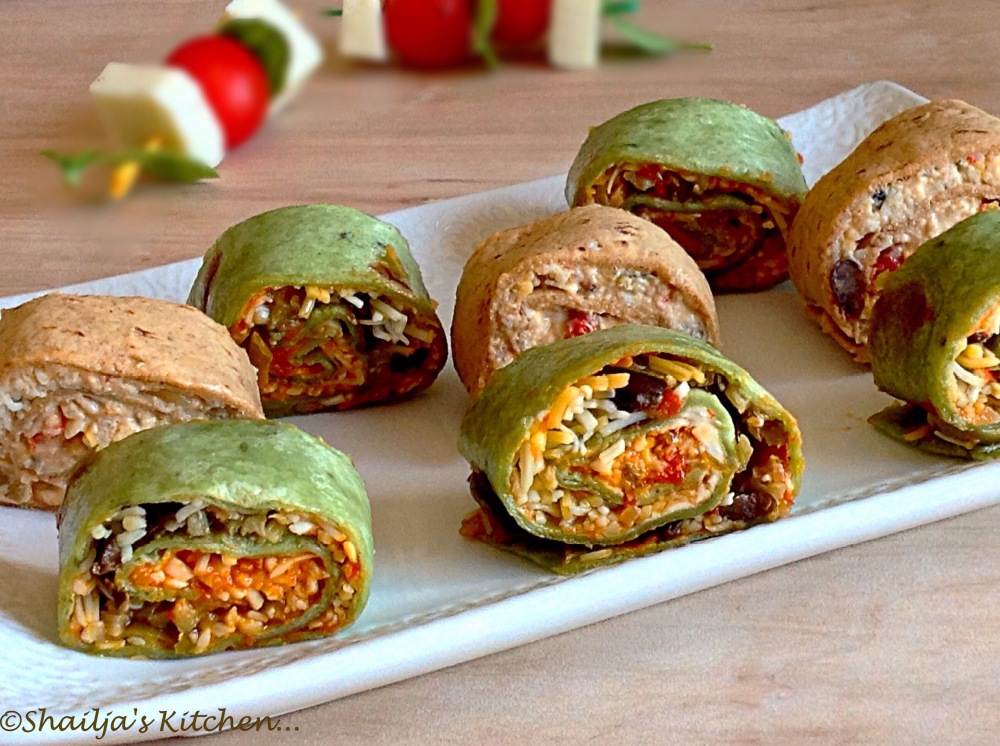
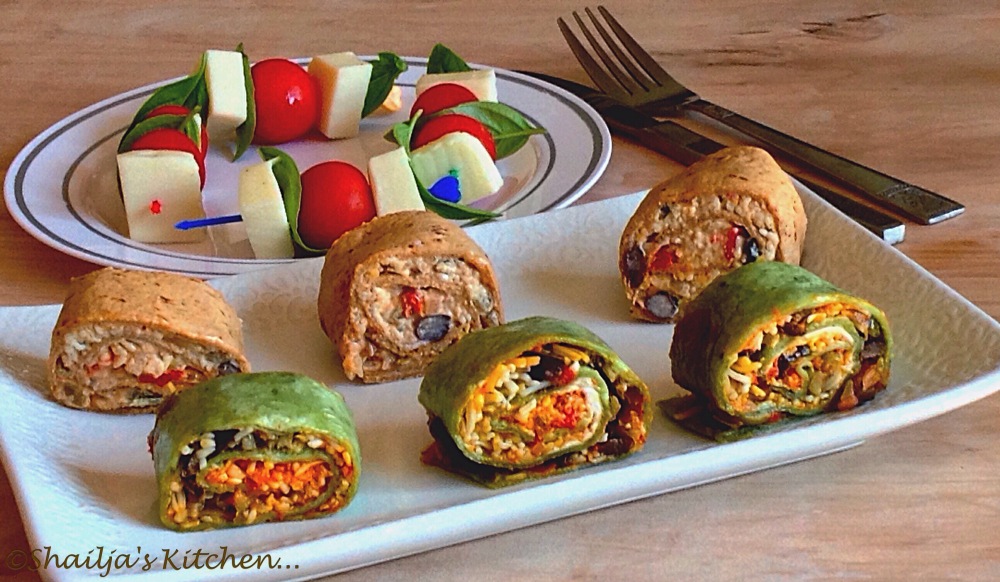
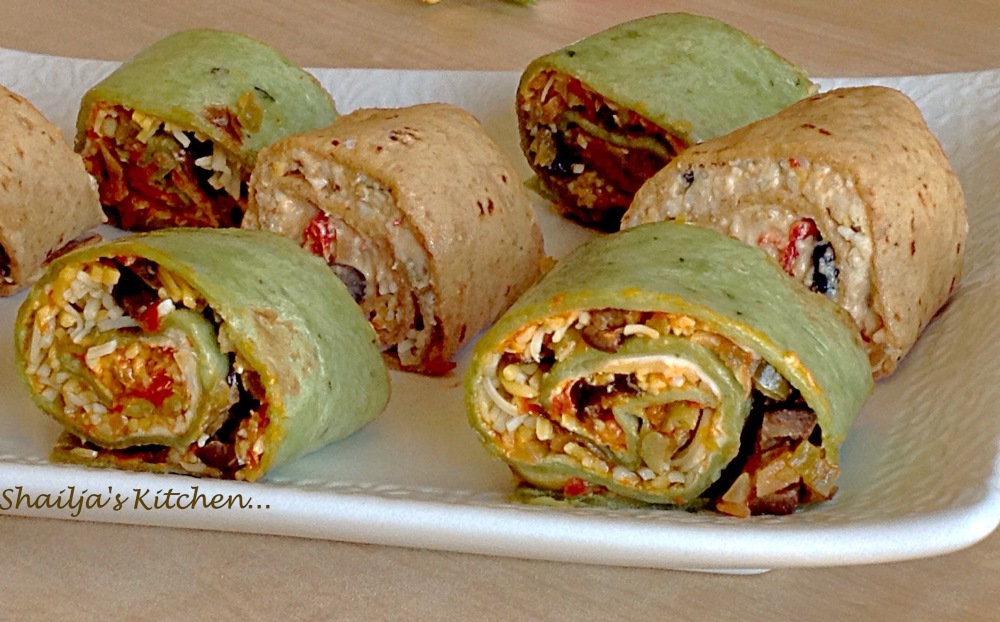
Pinwheels are versatile,easy to prepare and perfect for parties ,cook outs and big gatherings and can be prepared ahead of time ..
One of the great things about these pinwheels are that they are loved equally by kids as well as adults and easy to put together and can be made ahead of time for lunch boxes as well as For get to gather with friends & family .Regardless of how you serve these Mexican tortilla pinwheels, they’re sure to be a crowd pleaser….

image


I used extra-large spinach as well as whole tortillas to prepare these Mexican  tortilla pinwheels along with A medley of diced green chiles, black beans some Mexican cheese blend and chopped black olives and a spicy creamy mixture and rolled up into bite-sized pinwheels.

image

Taking these pinwheels to Sonal’s lunch box collective .. Do check her blog at http://simplyvegetarian777.com

image

Ingredients

4 oz Or 1/4 pack cream cheese @room temperature
1/4 cup sour cream
1/4 cup canned black beans ( drained and rinsed )
1/4 cup salsa of your choice
1/2 cup any shredded cheese ( i used Mexican blend )
1/4 cup chopped ripe olives ( I used canned )
1 Jalapeño pepper diced ( optional )
1/4 tsp cumin powder .
A pinch of garlic powder ( optional )
Dash if salt ( If needed )
4 extra large tortillas

Method :

1. In a small bowl, beat cream cheese & sour cream together until blended .
2. Now add all the other ingredients and mix well ..
3. Divide the mix into 4 equal parts & spread evenly on each tortilla .
4. Roll the tortilla with filling wrap in plastic. Refrigerate for 2 hours or overnight .
5. Cut into 1 inch rolls and serve …

NOTE :

1. Please do not overfill the roll ups as to much filling create pockets of air in the roll ups and they don’t hold their shape.

2. These rolls are much easier to cut once they are properly chilled ..

“Cooking is like love: It should be entered into with abandon or not at all.” — Harriet van Horne

image

Hyderabadi Mutton (goat) Biryani

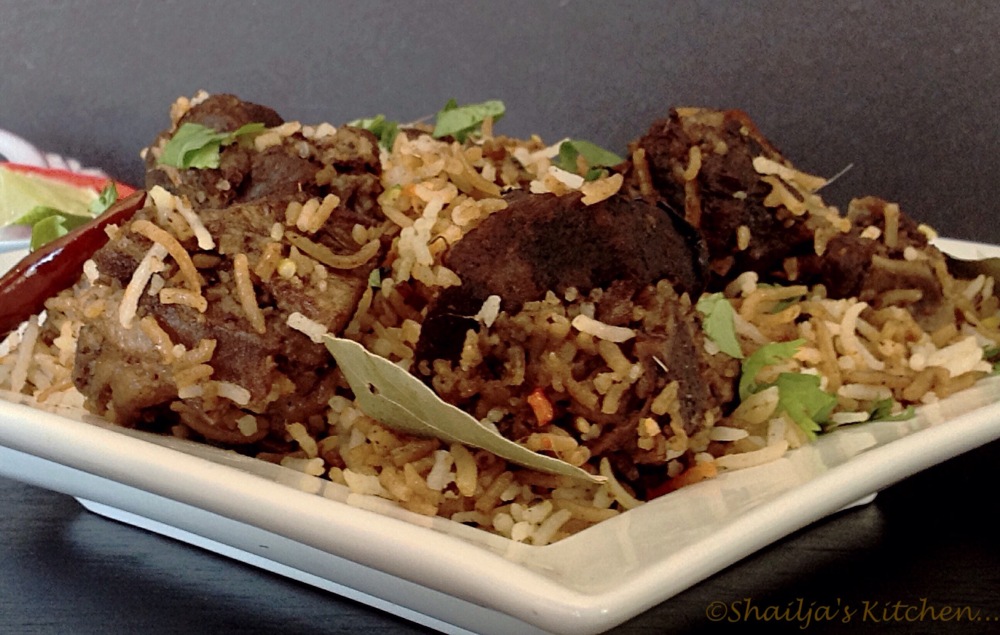
Mutton Biryani….image

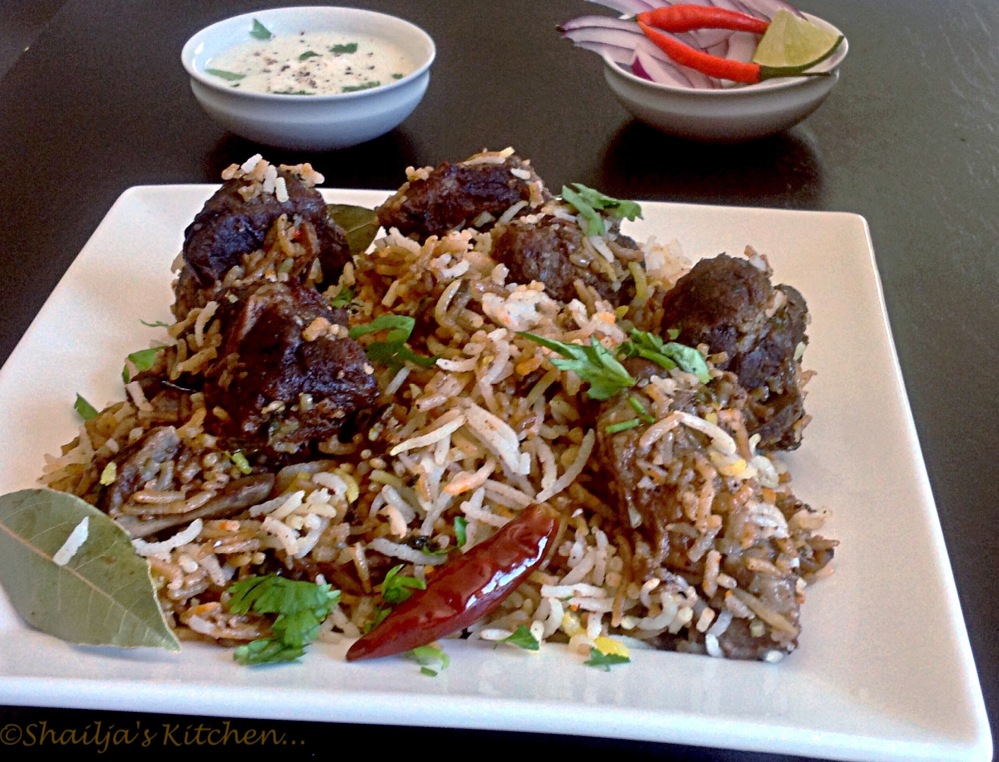
Hydrabadi Mutton Biryani is a mouth-watering spicy and fragrant biryani from the land of the Nizams.
Hydrabadi mutton biryani is a traditional style of making the biryani by cooking the raw meat with whole spices and then covered with rice, fresh mint leaves, saffron milk & fried onions and kept on dum until done.

image

There are two styles of Hydrabadi Biryani . Kacchi dum biryani and Pakki dum biryani . Kachi biryani is prepared by marinating the meat with spices and yoghurt overnight and then 3/4 cooked rice is placed on top of the raw meat and cooked in dum.
Whereas for Pakki dum biryani we cook the mutton and rice separately and then layer them and cook on dum for 30-45 mins ..

image

It is a bit tedious recipe, but the outcome is so delicious that every minute spent on cooking this is well worth it.
For this spicy treat we will be needing

Ingredients:

Marinade:

1 lbs Goat meat cut into pieces
1/2 cup yogurt
1 tbsp Ginger Garlic Paste
2 tsp Chili Powder
6 small Chilies split into two (adjust to your taste)
1/4 cup chopped fresh Mint Leaves
1/4 cup chopped Cilantro
Salt to Taste ( for the meat )
Garam Masala Powder 1 tbs

For Dum / Garnish 

1/2 cup fried onion
1 Lime
1/4 cup oil
½ tsp of saffron strands or orange food color
1/4 cup milk
2 cups Basmati Rice soaked for 30 minutes (rice cooker measuring cup)

Spices for boiling rice :

2 Cardamoms
3 Cloves
1Bay Leaf
1 tsp caraway seeds
½ tsp Ginger Garlic Paste
1 tbsp of Oil
First Full of Salt

Method:

Clean and cut the goat meat into medium pieces .

Mix all the ingredients of the marinade and marinate mutton pieces for at l2 hour , preferably overnight in the refrigerator .
Cook the meat with ½ the oil in a pressure cooker. Do not add any water as yogurt & meat will release its own water .In the pressure cooker it takes 2 to 3 whistles for the meat to get tender and 5 minutes on low flame to cook. Let it cool. Once the pressure in the cooker is released open it and cook the meat till all the water evaporates.
OR
You can cook the meat on the stove top until tender (about an hour or so )

Squeeze the lime juice on the meat and mix well.

In a pan, heat oil and fry the onions until light golden brown.

Soak saffron in hot milk.

In a big pot bring water to a boil, add all the spices ( Spices for boiling rice ):

Add rice and continue to cook until the rice is almost done. It takes about 7-8 minutes . Drain the rice and keep aside.

Preheat the oven to 400 degrees F.

Grease large baking tray with oil, layer half the rice at the bottom.
Sprinkle some oil, fried onions and ½ the saffron milk.
Layer the meat over the rice followed by a layer of remaining rice.

In the end We will have 2 layers of rice with one layer of meat in between .

Top it off the remaining oil, fried onions and saffron milk. Cover the tray with aluminum foil.
Bake the biryani for 10 minutes on 450 degrees F and then for 20 minutes on 400 degrees F. The total bake time is 30 minutes,

Mix the rice and serve with raita .

image

Note :
Marination is important ,this way the meat get tenderize with yogurt n blends with spices and gives u soft, juicy n spicy mutton.

You can even use beef or chicken instead of Goats meat .

image

There are plenty of ready biryani masalas available in indian and Asian stores . One of my most favorite brand is Shaan . You can follow the instruction at the back of the package .

image

English Muffins with Strawberry Butter !!!


image

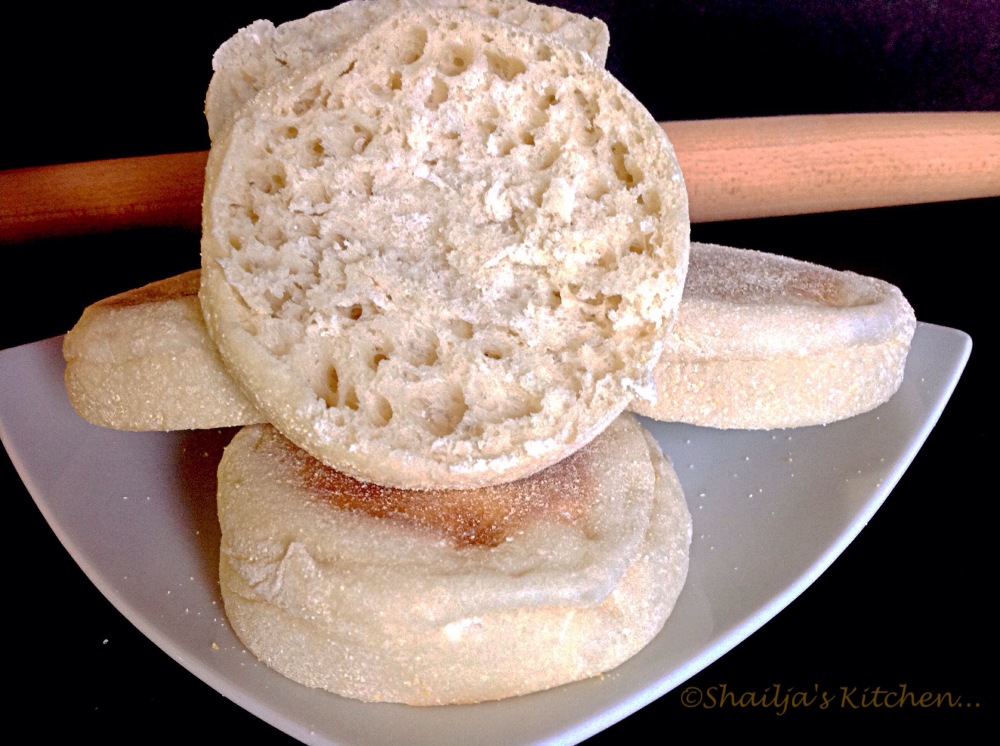
It took a few tries before I could perfect these bad boys . The recipe which I was trying to follow was not up to mark so had to tweak it a little .

So here I am presenting you English muffins along with home made strawberry butter .

image

English Muffins

INGREDIENTS:
1 cup milk
2 tablespoons white sugar
1 package active dry yeast
1 cup warm water (110 degrees F/45
degrees C)
1/2 cup melted shortening
6 cups all-purpose flour
1+1/2 teaspoon salt
DIRECTION
1. Warm the milk in a small saucepan until it bubbles, then remove from heat. Mix in the sugar, stirring until dissolved. Let cool until lukewarm. In a small bowl, dissolve yeast in warm water. Let stand until creamy, about 10 minutes.
2. In a large bowl, combine the milk, yeast mixture, shortening and 3 cups flour. Beat until smooth. Add salt and rest of flour, or enough to make a soft dough ( mine was done in 4 1/2 cups ) Knead. Place in greased bowl, cover, and let rise.
3. Punch down. Roll out to about 1/2 inch thick. Cut rounds with biscuit cutter, drinking glass, or empty tuna can. Sprinkle waxed paper with cornmeal and set the rounds on this to rise. Dust tops of muffins with cornmeal also. Cover and let rise 1/2 hour.
4. Heat greased griddle. Cook muffins on griddle about 10 minutes on each side on medium heat. Keep baked muffins in a warm oven until all have been cooked. Allow to cool and place in plastic bags for storage. To use, split and toast. Great with butter and jams .

image

Now lets go onto making Strawberry butter .
I used
2 sticks of room temperature unsalted butter
1/2 cup or to taste confectioner’s sugar
1 cup washed , hulled and coarsely chopped fresh strawberries .

IN a medium bowl or stand mixer mix butter and confectioners’ sugar until light and fluffy , Fold in the crushed strawberries and combine.
Transfer the butter in a container and refrigerate , Alternatively yo can even roll it into a log .

image

Taking these English Muffins to Sarika’s Bread collective ..

image

“Cooking is like love: It should be entered into with abandon or not at all.” — Harriet van Horne

RASPBERRY PINWHEEL DANISH Pastries ….

imageRASPBERRY PINWHEEL DANISH Pastries ….

Danishes are one of those impressive pastries that will have your guests rushing the table, and licking their fingers for more. So, when I was invited by Sonal to contribute for Her Semi home made Collective , I couldn’t resist my self and made these cuties ..
So Taking these Danishes to Sonal’s Semi homemade collective ..
Do check her blog Simply vegetarian777 for finger licking good vegetarian food …

imageRASPBERRY PINWHEEL DANISH Pastries ….

If you love pastries but don’t have time or like to knead a dough like me then this recipe is right up your street. This Danish Pastry recipe couldn’t be easier. I turned a simple grocery bought butter crescent dough into this easy & pretty looking raspberry pinwheels. How easy is that?!

imageRASPBERRY PINWHEEL DANISH Pastries ….

yield: 12-16 Danishes
cook time: 12 MIN

image

INGREDIENTS
1 (8-ounce) package cream cheese, at room temperature
1/2 cup sugar OR as Or taste
Lemon juice 2 tsp lemon juice
Zest of a lemon
1tsp vanilla extract
2 packs crescent roll dough sheets
18oz box fresh raspberries
2 tbs sugar to sprinkle on top Optional

Method
1.Preheat the oven to 400ºF and line two baking sheets with parchment paper .
2.In the bowl beat the cream cheese until smooth (You Can Even Use StandMixer or Hand mixer for beating the cream cheese )
3.Add the sugar,lemon juice, lemon zest and vanilla to the bowl and beat until combined. Set aside.
4.Roll out each sheet of crescent roll on a lightly floured work surface until it is a 10-inch square.
5.Cut square into 6-8 smaller squares & then transfer the squares to the parchment covered baking sheets in a way that squares do not touch each other .
6.Place a dollop of the cream cheese mixture (about 2 tsp ) into the center of the squar and then place 3 to 4 raspberries on top of the cream cheese .
7.Using a sharp knife, make four cuts from the center toward the edge of each square. Fold one corner from each piece you’ve cut into the center, pressing it lightly atop the raspberries. 8.Repeat the cutting and folding process with the remaining pastries.
9.Sprinkle the pastry with sugar (optional).
10.Bake the pastries for 12- 14 minutes,or until golden brown .

image

NOTE :
Use this versatile recipe with fresh fruit or seasonal jams, with custard filling or with cream cheese and fruit compotes too. Let your imagination run wild on this one .
And the nest part is that You can even make them savory ….

“Cooking is like love: It should be entered into with abandon or not at all.” — Harriet van Horne


image